
Lord / Lady
Seasonal Garden

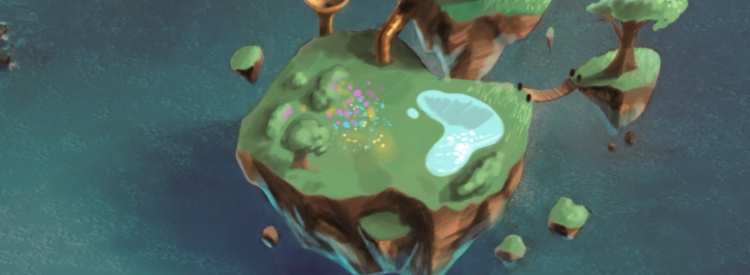
Zugzwang's Seasonal Garden is the perfect destination for those who can't make up their mind about the weather. Every few days, the seasons shift, bringing with them a new crop of mice with different powers. Keep an eye out for the shards of an old key- they might provide the way into that mysterious locked tower.
At Lord/Lady, paths start to diverge. Expect more travelling between locations if you intend to play optimally. The Seasonal Garden is a very interesting area. It has its very own cycle (see the MouseHunt Timers or #timers in Discord).
If you have an extra 925,000 gold, you can consider getting Zugzwang's First Move in the Trapsmith. If not, the Horrific Venus Mouse Trap is good enough.
On the top of your screen, you will see the HUD tracking your Tower Amplifier. Every catch of a Seasonal Garden Mouse will increase the Hunter’s Tower Amplifier charge between 1% to 6% depending on the mouse caught. Every Failure To Attract will reduce the charge of the Hunter's Tower Amplifier by 3%. Failing to catch a mouse has no effect on the Tower Amplifier’s charge. Due to the reasons above, it is advised to use Gouda Cheese here.
Note: A higher charge of the Hunter's Tower Amplifier will lead to a increased success in the next area (Zugzwang's Tower). Max charge of the Hunter's Tower Amplifier is dependent on your Rank.
- Lord/Lady - 150%
- Baron/Baroness - 160%
- Count/Countess - 175%
Seasonal Garden has 4 Seasons: Spring, Summer, Fall and Winter. Each season lasts for 80 hours with completely different mice. You will have to go through each season at least once to get each of the 4 Tower Key Shards. These are guarded by the toughest mice of each season. Once you have obtained all the Key Shards, craft them into the Key to Zugwang’s Tower.
Mice in each season are best caught with a specific Power Type but also have secondary weakness to Tactical weapons. Therefore, you can switch to a Tactical set-up if you are unable to promptly change your set-up when season changes.
Spring
- Primarily weak: Physical
- Weapon: Enraged Rhinobot
- Base & Cheese: Aqua Base and Gouda Cheese
- Loot Spring Key Shard from Vinetail Mouse
- SuperBrie+ Mouse (6% Tower Amplifier): Spring Familiar Mouse
Summer
- Primarily weak: Tactical
- Weapon: Horrific Venus Mouse Trap or Zugzwang’s First Move
- Base & Cheese: Aqua Base and Gouda Cheese
- Loot Summer Key Shard from Summer Mage Mouse
- SuperBrie+ Mouse (6% Tower Amplifier): Summer Mage Mouse
Fall
- Primarily weak: Shadow
- Weapon: HVMT (Preferred), ZFM, Grave, Coffin, Clock (Best CR but optional)
- Base & Cheese: Aqua Base and Gouda Cheese
- Loot Summer Key Shard from Harvester Mouse
- SuperBrie+ Mouse (6% Tower Amplifier): Fall Familiar Mouse
Fall|You should stay away from Fall after getting the Fall Key Shard.
Winter
- Primarily weak: Hydro
- Weapon: Ancient Spear Gun, Steam Laser Mk. I/II/III
- Base & Cheese: Aqua Base and Gouda Cheese
- Loot Summer Key Shard from Harvester Mouse
- SuperBrie+ Mouse (6% Tower Amplifier): Winter Mage Mouse
If you are unlucky, you may take a few cycles to collect all the Key Shards. Do not stay in the Seasonal Garden once you have the key shard for the current season. Here's a list of areas you should head to while waiting for the season to change, starting with the most important one:
- Slushy Shoreline/Iceberg
- Claw Shot City
- Derr Dunes - If you need more gold.
Once you got all the Key Shards, craft them into the Key to Zugwang’s Tower.
Continue hunting in Seasonal Garden until Tower Amplifier is fully charged (150% for Lord/Lady).
Buy Technic Pawn Pincher and Mystic Pawn Pincher (300,000 gold each) from Seasonal Garden Trapsmith. It looks expensive but it is absolutely essential for success in the next area.
Travel to Zugzwang’s Tower once you have Zugzwang's Tower Key and the Pinchers.
Zugzwang's Tower

An ordered chaos consumes this enchanted tower as the technological chess mice do battle with their mystical counterparts, all under the auspices of a dark game master who hides in the shadows. Conquer both Kings to find what lurks beyond the chess board, but beware: this is a place of powerful magics, where things are not always what they seem.
A Tactical weapon is required to catch all mice in Zugzwang’s Tower. The mechanics of Zugzwang’s Tower are not as straightforward as previous areas. Try to understand them so that you don’t feel lost when hunting in the area.
Zugzwang’s Tower is a chess-themed area with two groups of mice, Technic and Mystic. You have to catch mice of each group in order: 8 Pawns → 2 Knights → 2 Bishops → 2 Rooks → 1 Queen → 1 King
Initially, only Pawn Mice from both sides (Mystic & Technic) are available. Catching 8 Pawns of the same group unlocks its Knights. Catching 2 Knights of the same group unlocks its Bishops. This goes on until its King is unlocked. Note that even when higher pieces are unlocked, you can still attract lower pieces at a lower rate than before. For example, when Mystic Bishop Mouse is unlocked, you can attract Mystic Pawn Mouse, Mystic Knight Mouse and Mystic Bishop Mouse.
Tower Amplifier directly affects Power and Luck of your set-up in Zugzwang’s Tower. Power may increase or decrease with Tower Amplifier while Luck may decrease with Tower Amplifier. This has two implications:
- Always go into Zugzwang’s Tower with fully charged Tower Amplifier.
- Increasing Power is sometimes more effective than increasing Luck.
Similar to Seasonal Garden, Failure To Attract in Zugzwang’s Tower will reduce the charge of the Tower Amplifier. You should be using Gouda Cheese or SuperBrie+ (if you can afford it) here. Always focus on doing one side first and then the other side. Doing so reduces the chance of unlocking higher pieces on the side you do not want, which depletes more Tower Amplifier when caught. It is sometimes also beneficial to use a weaker set-up to minimize the chances of catching unwanted mice.
| Type of Mouse | Decrease in Tower Amplifier |
|---|---|
| Pawn | 1% |
| Knight | 3% |
| Bishop | 3% |
| Rook | 5% |
| Queen | 9% |
| King | 10% |
| Chess Master | 10% |
You will NOT lose any progress or Tower Amplifier if you leave the area. You would just be locked out of the Seasonal Garden the moment you catch a mouse in Zugzwang’s Tower.
You will be doing single runs (1 King per Run) in Zugzwang’s Tower. You can do multiple runs in Zugzwang’s Tower once you revisit the area with better Traps in the future. However from this point on, we will be focusing on single runs starting with the Technic side. If you are done with Technic king, its the Mystic side for you.
Ensure that Tower Amplifier is fully charged. Use Technic Pawn Pincher, Aqua Base, Gouda Cheese or SuperBrie+ (if you can afford it). Technic Pawn Pincher has increased attraction rate of Pawns of the Technic side and decreased attraction rate of Pawns of the Mystic side. Its Power is increased for Pawns of the same side but decreased for Pawns of the other side.
Once you have caught 8 Pawns on Technic side i.e. Technic Knights are unlocked, switch to Zugzwang’s First Move (or Horrific Venus Mouse Trap if you don’t have Zugzwang’s First Move) and Aqua Base. No charm is required but you can use any Charm to increase your Catch Rate.
Continue until you have caught 2 Knights and 2 Bishops on Technic side i.e. Rooks are unlocked. Rooks and Queen are quite strong so you may consider using Super Power Charm or Super Snowball Charm if you have any.
Continue until you have caught 2 Rooks and 1 Queen on one side i.e. King is unlocked. King is not too difficult to catch even at very low Tower Amplifier.
- When Tower Amplifier is at least 80%, use Pawn Pincher of the side with unlocked King, Base and Gouda Cheese or SuperBrie+.
- When Tower Amplifier is below 80%, use your best Tactical weapon (Zugzwang’s First MovHorrific Venus Mouse Trap), Fan Base and Gouda Cheese or SuperBrie+.
Technic King Mouse and Mystic King Mouse are highly sought after in Treasure Hunting. If you are not against the monetization of aspects of mapping, you should offer to snipe the King for a sizeable bounty (note that ongoing prices can fluctuate) on MouseHunt Discord or dedicated mapping groups like Mapmeisters.
Technic King Mouse drops Technic Cheese Mould while Mystic King Mouse drops Mystic Curd. These items will be used to craft a special cheese. You would be automatically transported to Seasonal Garden upon catching Technic King Mouse or Mystic King Mouse.
It is normal to see streaks of Failure to Catch as Tower Amplifier drops. Do not retreat unless it becomes impossible to catch a king, usually meaning 10% Tower Amplifier with King unlocked or 9% Tower Amplifier with Queen unlocked. Both strategy and (real-life) luck play an important role in this area.
If you are unable to catch a king, repeat the cycle of fully charging Tower Amplifier and doing a tower run until you catch Technic King Mouse or Mystic King Mouse.
Claim the adventure Capture the Mystic and Technic Kings and now you have unlocked the Fiery Warpath.
Slushy Shoreline
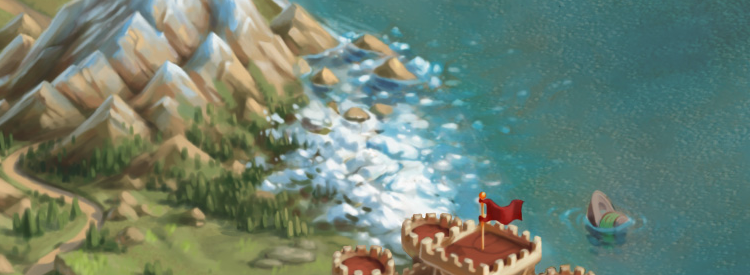
In recent days, huge chunks of ice have washed ashore the beaches of Gnawnia. Worse, dangerous mice have floated ashore alongside and are attacking the walls of Gnawnia! Head to the beaches and stop the invasion! You must be the rank of Lord/Lady to travel to this dangerous area.
Buy Icebreaker License in Harbour Cartographer if you haven’t bought it. Then, hunt in Slushy Shoreline to get Steam Laser Mk.I, which can be used during Winter in the Seasonal Garden instead of the Ancient Spear Gun.
Buy Softserve Charms in batches of 50 from the Charm Shoppe. It is required to attract mice that drops important loots. Use Ancient Spear Gun, Aqua Base, Softserve Charm and Brie or Gouda Cheese to attract mice. SuperBrie+ is not recommended as it is too expensive to be used here.
Collect the following loots:
- 4 Frosty Metal from Yeti Mouse
- 4 Heating Oil from Saboteur Mouse
- 4 Wire Spool from Icebreaker Mouse
- Around 100 War Scrap from other mice in the area
Buy the Steam Laser MK. I from the Trapsmith costing 345,000 gold along with the Frosty Metals, Heating Oils and Wire Spools.
Head over to Iceberg once you have the Steam Laser MK. I.
Iceberg
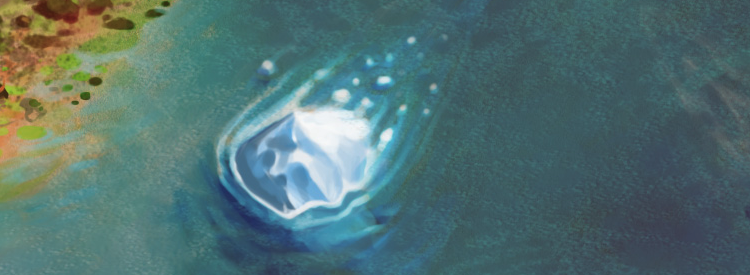
Iceberg, dead ahead! Teeming with mice, and on a collision course with the beaches directly outside Gnawnia's castle, this Iceberg must be stopped at all costs! You must be the rank of Lord/Lady to travel to this dangerous area.
Before you travel to the Iceberg, you should be ready for it. It‘s a complex area and the mice are not weak. Also, the traps and bases acquired here are either region-specific or easily outclassed by upcoming gear. This makes the Iceberg a rather low priority sidequest in terms of story progression.
Buy 100 Sticky Charm 5-Pack from the Charm Shoppe. Sticky Charm prevents you from any pushback in the Iceberg. Use the Steam Laser MK. I, Aqua Base, Gouda Cheese and Sticky Charm to hunt in Iceberg.
Iceberg has 4 major zones, each with different length and mouse populations. You move forward or backward the Iceberg when catching or missing certain mice. After each zone, you need to catch a General before you can proceed to next zone. Generals drop Bottled Cold Fusion, which will be used in crafting new trap components.
The Heads-Up Display (HUD) tracks the number of hunts spent in this run, which determines what bosses can be encountered and number of chests rewarded at the end of run.
- Iceberg Treasure Chest is rewarded for completing a run in 275 hunts.
- Iceberg Strongbox is rewarded for completing a run in 350 hunts.
- Iceberg Supply Chest is rewarded for completing a run in 425 hunts.
- When more than 425 hunts have been taken in a run, Living Salt Mouse becomes abundant, wmakes progressing easier.
The first zone is Treacherous Tunnels, with a depth of 300 feet. Tunnel Rat is common here and moves you forward significantly when caught.
The second zone is Brutal Bulwark, with a depth of 300 feet. Brute is common here and pushes you back even when caught.
The third zone is Bombing Run, with a depth of 1000 feet. Bomb Squad is present here and can either move you forward or push you back.
The final zone is The Mad Depths, with a depth of 200 feet. Zealot is present here. It is fairly difficult to catch and doesn’t move you forward when caught. Thus, this is considered the most difficult zone.
After finishing The Mad Depths and catching the last General, you would be at Icewing’s Lair.
First Run
- Use Steam Laser Mk. I, Aqua Base, Sticky Charm and Gouda Cheese. If you have decent bases at least 10 Luck (likely from events), use that instead.
- Remember that no charms are required for catching Generals.
- Continue hunting until you reach Icewing’s Lair, where you would encounter Frostwing CommaMouse.
- Loot 1 Well-sealed Canister from Frostwing Commander Mouse.
- It is unlikely to get any chests on first run unless you have decent bases.
- You would automatically transported to Slushy Shoreline upon catching Frostwing Commander M
Preparations for the Second Run
- Head back to Slushy Shoreline and use the Steam Laser Mk. I, Aqua Base, Softserve CharmGouda Cheese.
- Farm 16 Wire Spools, 13 Frosty Metals, 13 Heating Oil and 150 War Scraps.
- Buy 1 Remote Detonator Base from the Trapsmith
- 3 Bottled Cold Fusion
- 4 Wire Spool
- 1 Frosty Metal
- 1 Heating Oil
- 48,500 gold
- Travel back to the Iceberg for your second run.
Second Run
- Buy extra Sticky Charm 5-Pack from the Charm Shoppe to get at least 300 of it.
- Buy Ice Drill Mk. I - III if you have enough War Scraps.
- Use Steam Laser Mk. I, Aqua Base, Sticky Charm and Gouda Cheese. If you have decent bases at least 10 Luck (likely from events), use that instead.
- When you are in the Bombing Run, switch to the Remote Detonator Base. You will move 20 feethunt if you catch the Bomb Squad mice.
- After Catching the General at the end of Bombing Run, switch to another Weapon. Buy Steam LMk. II from the Trapsmith with
- 1 Steam Laser Mk. I
- 4 Bottled Cold Fusion
- 12 Wire Spool
- 12 Frosty Metal
- 12 Heating Oil
- Now continue to hunt using Steam Laser Mk. II, Aqua Base, Sticky Charm and Gouda Cheese.
- If you reach The Mad Depths under 400 hunts, drill 7 times with Ice Drill. Do not drill the General.
- Continue hunting until you reach Icewing’s Lair. Icewing can be encountered as long as you taken not more than 425 hunts this run. Otherwise, you would encounter Frostwing Commander Mouse again.
- Remember to offer to snipe Icewing on MouseHunt Discord or Facebook mapping groups Mapmeisters if you are not opposed to mapping economy.
- Catch Icewing to loot 1 Steam Nine. If you are using Steam Laser Mk.II, the weapon would bebroken.
- Switch to another weapon. Smash Steam Laser Mk. II (Broken!) into Steam Laser Mk. II Parts.Steam Laser Mk. III with 1 Steam Laser Mk. II Parts and 1 Steam Nine from the Trapsmith.
- Claim the adventure Hunt for Icewing after catching Icewing.
- You should be able to obtain at least Iceberg Supply Chest. Open the chest(s) rewarded for supplies.
- You would automatically be transported to Slushy Shoreline upon catching either IcewinFrostwing Commander Mouse.
- Unless you fail to catch Icewing this run or you want to do extra runs, travel to Claw City.
Claw Shot City
It was a dry and dusty day in Gnawnia when the Old West rolled into town... And with it came some of the meanest, nastiest creatures you ever did saw. The local Marshall needs MouseHunters to help bring the Law back to this valley. Will you help track down the lawless Wild Bunch gangs?
A Law weapon is required to help you track down the Wild Bunch gangs. Buy S.L.A.C from the Trapsmith for 150,000 gold.
Use S.L.A.C, Aqua Base and Brie Cheese.
Loot 1 Sealed Wanted Poster from Bounty Hunter Mouse. Opening the Sealed Wanted Poster to get a Wanted Poster, containing 4 Accomplices and 1 Ringleader. You can invite a friend along to help in the hunt.
Catching all the Accomplices unlocks the Ringleader. After capturing the Ringleader, you will get some Fool's Gold. Fool's Gold can also drop from some mice in Claw Shot City. Once you collected 25 Fool's Gold, you can buy Fort Rox Battle Summon from the Cartographer.
You should also collect an additional 50 Fool's Gold to buy the upgrade to the S.L.A.C, S.L.A.C II, as it would be useful in Fort Rox.
Claim the adventure Track Claw Shot City's Most Wanted if you managed to clear all the Ringleaders required. If not, it is fine as it is not integral to the progression.
What to do next
Once you ranked up to Baron, head over to the Fiery Warpath