
Count / Countess
Queso River

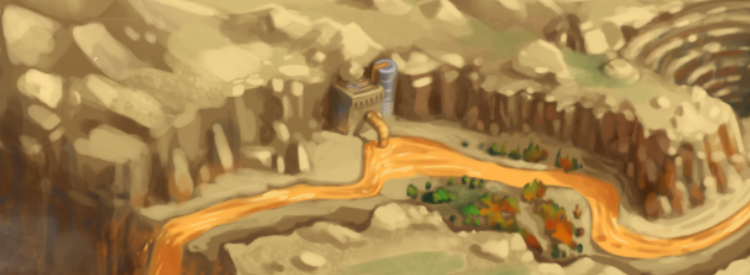
A free-flowing river of Bland Queso with an unknown origin. Being located deep within a canyon has kept it safe and hidden for quite sometime. Pumps established here can pump the Bland Queso straight from the river.
Queso Part 1 consist of 3 Areas - Queso River, Prickly Plains and Cantera Quarry. You can earn some SUPERBrie+ from sniping in every area here, check out discord for more info.
Queso River
- Use S.L.A.C II, Aqua Base and Gouda here.
- When you hunt here, you will be pumping Bland Queso. The number of Bland Queso you get per catch is dependant on your Pump level (Upgradable with materials from Cantera Quarry).
- Level 1: 1 Bland Queso per Catch.
- Level 2: 2 Bland Queso per Catch.
- Level 3: 5 Bland Queso per Catch.
- Level 4: 7 Bland Queso per Catch.
- Level 5: 12 Bland Queso per Catch.
- Level 6: 30 Bland Queso per Catch.
- Level 7: 40 Bland Queso per Catch.
- Level 8: 60 Bland Queso per Catch.
- Level 9: 150 Bland Queso per Catch.
- Level 10: 200 Bland Queso per Catch.
- You can buy Queso Pump Charm from the Marketplace to increase the rate of pumping Bland Queso.
- You need to use a lot of Bland Queso as materials for the higher tiered cheese.
Pricky Plains
- Use ARCONYM, Aqua Base and Bland Queso here.
- Using different cheese, you will get leaves for the next tiered cheese.
- Using Bland Queso - You get Mild Spice Leaf.
- Using Mild Queso - You get Medium Spice Leaf.
- Using Medium Queso - You get Hot Spice Leaf.
- Using Hot Queso - You get Flamin' Spice Leaf.
- Using Flamin' Queso - You get Ember Root.
- It is recommended you use Magic Essence to craft Hot, Flamin' and Wildfire.
- Continue the cycle until you have at least 40 Flamin' Queso, if you run out of Bland Queso, head back to Queso River to pump more.
- Use Flamin' Queso and a good charm (Super/Extreme Snowball Charm) and collect 15 Ember Roots before moving on to Cantera Quarry.
Cantera Quarry
- Use Interdimensional Crossbow Trap, Aqua Base, Flamin' Queso and a good charm (Super/Extreme Snowball Charm) here.
- Collect 12 Ember Roots and 1000 Nachore (Do not upgrade your Pump first).
- Buy Overgrown Ember Stone Base (OESB) with 15 Ember Roots, 12 Ember Stones, 1,000 Nachore and 7,800,000 gold.
- Change your base to OESB and finish off the rest of your Flamin' Queso here and upgrade your pump. However, do not upgrade your pump past level 6.
Claim the Adventure Extinguish Inferna, The Engulfed. Then continue the cycle and focus on getting 1,200 Nachore and buy Fully-Functional Queso Geyser Replica Clay Model from the Cartographer.
For now, your goal would be to collect the 3 traps from the Trapsmith - Scarlet Ember Root Trap (SERT), Blazing Ember Spear Trap (BEST) and Ember Prison Core Trap (EPCT). For the first two traps just repeat the steps listed above to farm Ember Roots, Ember Stones and Nachore. To get Unstable Ember Gadget for EPCT, you would need to catch Queen Quesada.
Queen Quesada - In order to catch her, you would need Wildfire Queso. You would need 25,000 Bland Queso, 10 Ember Roots and 10 Ember Stones for 3 Wildfire Queso. However, you are highly recommended to add 3 Magic Essences to get 6 Wildfire Queso in total. Use S.L.A.C II, OESB, Wildfire Queso and Extreme/Ultimate Snowball Charms to catch Queen Quesada in Queso River, you would need 15 Unstable Gadget so you might need to craft multiple batches of Wildfire Queso.
You can head over to Queso Geyser, once you obtained traps advised.
Queso Canyon Grand Tour
Rare Queso Canyon Grand Tour (RQGCT) would be extremely helpful in cutting down the time spent farming Bland Queso and Spice Leaves. You can try joining a public map via the community tab or leeching one over in Discord. It is recommended to always use a Rare Map Dust on this map.
If you complete/leech a RQCGT, you can use it to most of the steps listed in the guide above. Some loots will also be helpful in the Queso Geyser.
(R)QCGT is guaranteed to give you the following
- Common - Rare
- Gold: 100,000 - 200,000
- Points: 170,000 - 140,000
- Ancient Charm: 20 - 40
- Medium Spice Leaves: 10 - 0
- Hot Spice Leaves: 5 - 15
- Flamin' spice Leaves: 0 - 10
- BQ: 10,000 - 50,000
- Wild Tonic: 5 - 15
- Queso Pump Charm: 3 - 20
- Corkbark: 30 - 100
Along with some of the following items
- Baitkeep Charm: 1
- Dragonbane Charm: 5 - 10
- Ember Charm: 1
- Ember Root: 1 - 5
- Ember Stone: 1 - 5
- Flamin' Spice Leaf: 3
- Geyser Smolder Stone: 1
- Magic Essence: 5 - 10
- Magic Nest Dust: 1
- Queso Thermal Spring: 1
- Solidified Amber Queso: 10
- Super Dragonbane Charm: 3 - 10
- Thermal Chisel: 1
- Ultimate Charm: 1
- Ultimate Power Charm: 3 - 5
Queso Geyser

A highly active geyser home to powerful Draconic mice. The extreme heat fluctuations and stages of the geysers natural eruption cycle also affect the activity of the native mice population.
This is the second part of the Queso region.
You are recommended to use BEST and OESB here. You can earn some SUPERBrie+ from sniping in every stage here, check out discord for more info. There are 3 stages in the Queso Geyser
- Cork Collecting
- Pressure Building
- 5 Different Types of Eruptions
- Tiny Eruption - Do not end up here
- Small Eruption
- Medium Eruption
- Large Eruption
- Epic Eruption
Pressure per hunt (For reference later)
- Mild: 5 kPa
- Medium: 5 - 15 kPa
- Hot: 5 - 40 kPa
- Flamin: 5 - 100 kPa
- Wildfire: 1500 kPa
Recommended Charms
- Small Eruption: Ancient Charm or Super Snowball
- Medium Eruption: Ancient Charm or Super Snowball
- Large Eruption: Dragonbane Charm
- Epic Eruption: Dragonbane Charm
You collect Cork Barks in the Cork Collecting stage, which will be used in every Eruption you attempt. Cork is pushed into the Geyser, allowing pressure to be built up, which eventually results in an eruption. If you leeched a couple of RQCGT, you should have sufficient Cork Barks to begin the Eruption stages. The higher tiered Queso used here will give you more Cork Barks per hunt, however it is not recommended to hunt with anything higher than Medium Queso due to how difficult it is to obtain higher tiered cheese.
Small Eruption
- Construct Small Cork - Cost 10 Cork Barks.
- Enter Pressure Building Stage - Raise Pressure to 35 kPa.
- Recommended Cheese - Medium (Preferred) or Mild Queso.
- You have 10 hunts to hit 35 kPa.
- If you reached 35 kPa before the 10 hunts, you will enter Small Eruption immediately.
- Eruption Stage (10 Hunts) Recommended Cheese - Medium (Preferred) or Mild Queso.
- Snipe options - Spicekin, Sizzle Pup (Sizzel Mild) and Smoldersnap.
- Do NOT use a Magic Nest Dust (MND) here.
- You will collect Congealed Rubber, you need it to start a Medium Eruption.
- Repeat the cycle until you have collected 15 Congealed Rubber.
Medium Eruption
- Construct Medium Cork - Cost 30 Cork Barks & 15 Congealed Rubber.
- Enter Pressure Building Stage - Raise Pressure to 175 kPa.
- Recommended Cheese - Hot (Preferred) or Medium Queso.
- You have 25 hunts to hit 175 kPa.
- If you reached 175 kPa before the 25 hunts, you will enter Medium Eruption immediately.
- Eruption Stage (20 Hunts) Recommended Cheese - Hot (Preferred) or Medium Queso.
- Snipe options - Bearded Elder, Smoldersnap, Ignatia (BE Trio) and Smoldersnap.
- Do NOT use a Magic Nest Dust (MND) here.
- You will collect Geyserite, you need it to start a Large Eruption.
- Repeat the cycle until you have collected 30 Geyserite.
Large Eruption
- Construct Large Cork - Cost 90 Cork Barks & 30 Geyserite.
- Enter Pressure Building Stage - Raise Pressure to 1000 kPa.
- Recommended Cheese - Hot (Preferred) or Medium Queso.
- You have 50 hunts to hit 1000 kPa.
- If you reached 1000 kPa before the 50 hunts, you will enter Large Eruption immediately.
- Eruption Stage (40 Hunts) Recommended Cheese - Flamin' (Preferred) or Hot Queso.
- Snipe options - Cinderstorm and Bruticus, the Blazing (Cinderbrut).
- If you can afford to, use a Magic Nest Dust (MND) here.
- You will collect Tungsten, you need it to start a Epic Eruption.
- Repeat the cycle until you have collected 60 Tungsten.
Epic Eruption (Read further down first)
- Construct Epic Cork - Cost 180 Cork Barks & 60 Tungsten.
- Enter Pressure Building Stage - Raise Pressure to 3000 kPa.
- Recommended Cheese - Wildfire (With Wild Tonic preferred) or Flamin' Queso.
- You have 100 hunts to hit 3000 kPa.
- If you reached 3000 kPa before the 100 hunts, you will enter Epic Eruption immediately.
- Eruption Stage (80 Hunts) Recommended Cheese - Wildfire (Preferred) or Flamin' Queso.
- Snipe options - Kalor (with Wildfire) or Stormsurge & Bruticus (with Flamin').
- Please use a Magic Nest Dust (MND) here.
You would usually clear the entire Epic Eruption, however on your first run, leave the the area after you caught your first Kalor. Then claim the adventure Slay the Geyser Dragon. You will come back and finish the rest of the Epic Eruption when you have better traps in the future.
Traps in Queso Geyser
- Queso Font Trap (QFT) - Recommended to get as it is on par with School of Sharks and useful in Grift as well.
- Gouging Geyserite - If you have Sphynx Wraft Trap, you can skip this.
- Smoldering Stone Sentinel - If you have Sandstorm Monstrobot, you can skip this.
Head onto Gnawnia Rift, if you have not completed the adventure. If you completed Gnawnia Rift adventure, you could stay in the Queso Region to snipe and earn more SB or head over to Sunken City (Optional for progression).
Gnawnia Rift
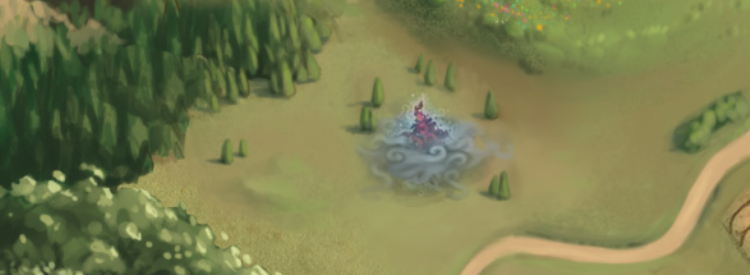
Within the depths of the unknown, creeping among the mists of mystery, the Gnawnia Rift is haunted by the most menacing, terrifyingly thought-bending, and maniacally mind-warping mice one could imagine... What will you find beyond the tear is vast and unknown. Brace yourselves for a challenge of great proportions!
A rift has torn through the fabric of reality and opened up the way into a weird place made of reddish-purple clouds. You're in for a ride here.
Use Sphynx Wrath, Overgrown Ember Stone Base and Chrome Charms here. Buy Brie String Cheese from the Cheese Shoppe. Continue hunting until you have collected 10 Riftiago Potions. Convert your Brie String Cheese into Riftiage Cheese, the Magical String Cheese option is NOT worth it.
Hunt with Riftiago Cheese until you've collected 15 of Magic Seeds, Riftgrass and Rift Dust. Continue the cycle until you met the requirements.
Craft 5 batches of Resonator Cheese (4 Piece) with:
- 3 Magic Seeds
- 3 Riftgrass
- 3 Rift Dust
- 1 Rift Curd - Buy from the General Store
- 1 Ionised Salt - Buy from the General Store
Now hunt with Resonator Cheese for Goliath Field mouse. Once you've caught it, it will drop a Raw Rift Crystal, use the Rift Crystal to buy Crystal Tower, found in the Trapsmith for 4,900,000 gold. The area gets easier from this point onwards, equip Crystal Tower and hunt out the rest of your Riftiago and Resonator Cheese, if you still have some left.
Claim the adventure Capture the Goliath Field Mouse. Head onto the Queso Region, if you have not completed the adventure. If you completed both Queso's adventure, you could stay in the Queso Region to snipe and earn more SB or head over to Sunken City (Optional for progression).
Sunken City
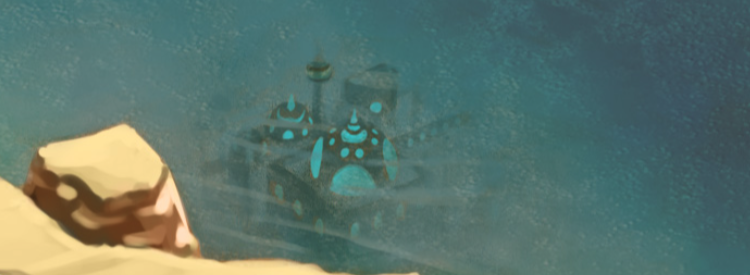
Dive into the depths of the Rodentia Ocean and explore this ancient underwater city! Great treasures await adventurous hunters who journey into the deep waters!
You've choosen the path not often choosen. Well done i guess.
Sunken City is split into 2 parts, the first is the Docked Stage, the second is the Dive.
First Stage
When you first start out in the area, you will be at the Docked Stage. Your goal during the Docked Stage is to collect Oxygen from the mice. Continue hunting with your best Hydro Trap (Steam MK III or Queso Fount Trap), OESB. Consider getting Oxygen Burst Charm from the Marketplace, if not you can choose to use any catch rate charm. Collect around 200 Oxygen before taking your first dive.
Start diving and hunting as per normal to collect Materials for the Fishy Formage namingly, Barnacle, Mouse Scale and Damaged Coral Fragments. Once your 200 Oxygen runs out, craft all the Fishy Formage and use them to hunt at the Docked Stage to collect even more Oxygen.
Second Stage
Collect 600-1000 Oxygen before diving again. You can choose to buy Smart Water Jet Charms from the Marketplace to speed up your progress but do take note it is very expensive. During your dives, you might encounter Treasury Zones (Dark Yellow Dot), consider using (Golden) Anchor Charms in Sand Dollar Sea Bar, Pearl Patch and Sunken Treasure.
Once you crossed 10,000 metres, look out for the Monster Trench (MT) and the Lair of the Ancients (Lota). Use Empowered Anchor Charm in MT and it is recommended you get Ultimate Anchor Charm in Lota. Claim the adventure Explore the Sunken City when you caught your first Tritus Mouse.
You can continue your dive, looking for more Sunken Treasure to get more Sand Dollars for your Rune Shark and School of Shark afterwards but you could wait for events to get them easier (Great Winter Hunt and Spring Egg Hunt). It is recommended that you skip Tidal Base as a purchase.